
I know most people consider winter the ultimate hosting season because of all the holidays, but for me spring and summer will always be the best time to host friends. It stays light out longer, the air is warm, and spirits are high, it’s the perfect recipe for a good party! I actually keep my party banner up all the time because it’s so fun and colourful and brings me so much joy to see it every time I wake up. Whether yours stays up year round, or is only brought out for parties, it’s sure to bring a smile to anyones face! It’s also a great project for beginners, since its simple, only requires a straight stitch, and doesn’t need a pattern. If you can’t (or won’t) sew, you could technically use hot glue for this project as well, but it won’t look as clean.

Draw out the shape you would like to hang from your banner. I chose triangles, however you could also do squares, scallops, or really any shape that is flat on the top.

Draw a half inch seam allowance along the sides of your shape.
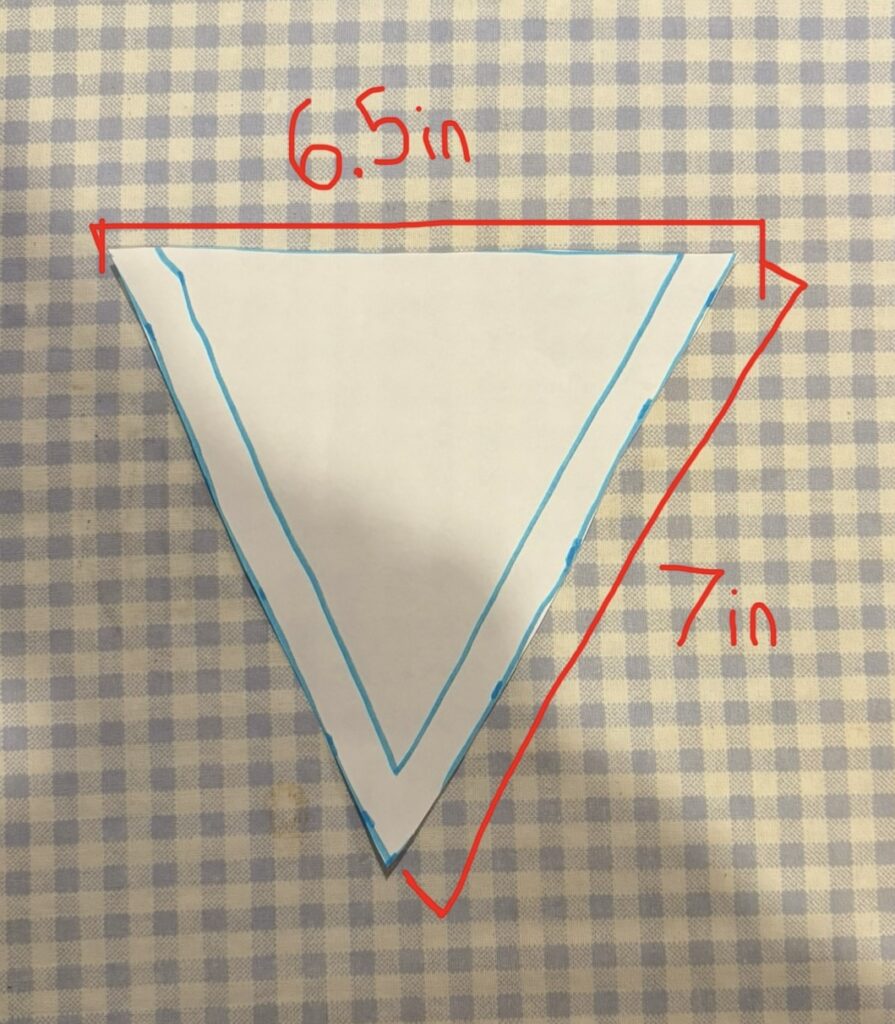
Cut out your shape, this will be the template for your banner. Mine ended up being 6.5 inches long by 7 inches long

Trace or pin your template onto your fabric.

You’ll need two pieces cut per flag you want hanging from your banner.

Place your two pieces right (pretty) sides together. Since my example is a solid fabric it didn’t matter, but you’ll need to make sure your right sides are together if you’re using a patterned fabric.

Stitch around the sides of your flag with a half-inch seam allowance.

Trim outside your seam to help your flag lay flat (I did this with pinking shears). Also make sure to notch any corners!

Flip your flag inside out and iron it flat.

Make sure the top of your flag is even, I also pinked the top edge to prevent any fraying while working, but that’s optional.

once you have your desired number of flags, lay them out in the order you’d like them, leaving a space between each one will allow the banner to hang prettier, with the flags falling more naturally.

The next step is to make the bias tape that will finish the banner (although for this project you don’t need to cut on the bias, so I guess you could just call it tape?) Anyways, if you don’t know how to make bias tape, cut a piece of fabric to the desired length of your banner + about 1in, and 4X the desired width (I cut mine to be about 2in wide, so it would be half-an-inch wide finished.) Fold the top and bottom edge into the middle and iron.

Fold the tape in half, so the raw edges are tucked inside and iron.

Lay out your tape along your flags.

Open your bias tape above each flag, and line up the top edge of each flag with the middle of the tape.

Close the tape over the top edge of the flag and clip each corner.

To finish the end of your bias tape, open the end of it and fold it in before closing it again and sewing along the open edge.

Now you can put the whole banner together by sewing lengthwise along the open edge of your bias tape, over each flag from end-to-end.

And now you have the cutest party banner, the perfect diy party decoration!
As usual, thanks for reading friends! More to come!
4 responses to “How to Make the Sweetest Party Banner”
Omg I wanna make one now 😋 I used to have a sewing machine and I really need a new one this is so cute.
I want to go to there, your spring and summer parties sound super fun and cozy!!!
you’re inspiring me to get into sewing this summer:) you made it look so cutsey
you’re inspiring me to get into sewing this summer:) you made it look so cutsey
(pls ignore my previous comment >•<)